Thursday, November 24, 2011

Counting my blessings

Thanksgiving is a time for counting your blessings & being reminded of all that you have been blessed with.


This Thanksgiving I am reminded to be Thankful for my Husband. We do not always see eye to eye & there are days I am sure we drive each other crazy BUT we have love & we have each other & we always work things out somehow... for this I am grateful.I am Thankful for my sons!! They bring me the biggest joy & sometimes a few extra gray hairs BUT they fill my heart with love & joy to a capacity that could just make it burst & for this I am grateful.


I am thankful for my new nephew! My Squish!! I love him like he is my own & I cant wait for all the fun times we are going to have together. I love that he will be someone that my boys can be a role model to & that he has filled their hearts with love too! For this I am grateful!


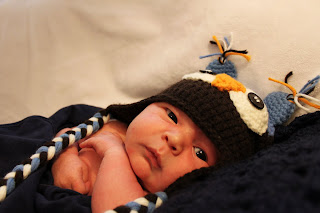
I am thankful that my baby sister is now a mother to a beautiful baby boy! I know she is & will continue to be a great Mommy & my heart is overjoyed for her. For this I am grateful!


I am thankful that my brother-in-law is an awesome Dad & that he loves my sister beyond words. He will show my nephew how to grow up to be a great man! For this I am grateful!


I am thankful for brothers!!! I have 2 awesome brothers that are great inspiration for my boys. They give my boys someone they can turn to when sometimes Mom & Dad just don't cut it & for this I am grateful!!


I am thankful for ALL my sisters who give me a fuller life without even knowing it. They make me laugh & let me express my opinions & they are there for me when I need to vent & for this I am grateful!


I am thankful for cousins because they are just as important as sisters. I am blessed to have my cousins nearby to share in the joys of my life & for this I am grateful.
I am thankful for the parents who take care of all of us. While I have separate families...they are all equally important to me in every way because without each of them I would not be the person I am today.


They have loved me even when it would have been easy to be mad instead. They have forgiven me even though it would have been easy to walk away. They have given advice even when it would have been easy to let me struggle on my own. For this I am grateful!


I am thankful for my close friends (you know who you are). You are even


more special than you know.....you CHOSE to make me a part of your life & for this I am grateful (because honestly I don't know what I would do with out you)


I am also grateful for my numerous Aunts & uncles who are a HUGE part of my life I love you all & am so Grateful that we are such a close family!


I hope you counted your blessings today & were reminded of the many reasons life is so precious.


Happy Thanksgiving everyone!

Thursday, November 17, 2011

Addictive little things!

Let's talk about cake balls!! I know they are everywhere.....& with good reason! These little bite size goodies are so easy to make & they are to die for.


You start by making your favorite cake, this time I chose chocolate but they are equally as good in MANY other flavors Then you take this perfectly moist delicious cake & crumble it up.......yes I said crumble, ruin the cake people, its OK, I promise!


Then I used gobs of peanut butter, I didn't measure it, I just mixed in enough to make the cake come together into a dough. That part isn't exact science. Most people use a tub of store bought icing & that taste equally as scrumptious but this time around I was going for that chocolate - peanut butter flavor


see below how it is starting to come together like a cookie dough...that's what you want it to do


then you roll small amounts into balls & place on a sheet pan lines with parchment paper or in my case tin foil


then you will pop them into the freezer until they firm up. This makes them easier to handle when you give them a dip chocolate


I guess I could have tried to take a picture of the fork method of dipping but lets face it...this is a messy job! At least for me it is!

I used regular old chocolate chips, the kind you use in chocolate chip cookies. Some people use almond bark but I find it way too sweet. I used the semi sweet but also dipped some in milk chocolate chips to satisfy my 15 year old who doesn't like chocolate!!! I KNOW a complete sin. . But if he is willing to try the milk chocolate the least I can do is oblige him!

I dumped the chips in a glass bowl & followed the package directions for melting them in the microwave. worked like a charm & I was able to melt it without seizing up the chocolate. I always seems to do that with the double boiler method. . .I apparently get moisture in the chocolate.

You can totally tell the difference between the 2 I think the dark taste the best, Oh & its good for you too.....at least that's what "they" say!

Once I get them covered in chocolate I pop them back in the freezer to speed the cooling process & then I like to keep them in the fridge. I love when the outer chocolate snaps when you bite into it & then you get the moist luscious cake inside. Pure heaven.
I really owe my new found love of cake balls to My Uncle Jeff. He was apparently obsessed with making them last year & made all kinds of flavors, so he introduced them to us & they have been a hit ever since. So I say Thank you Uncle Jeff ( my thighs NOT so much)
On a final note I have extra cake balls made up in my freezer waiting to get dipped because I always seem to have more cake balls than melted chocolate. I find this is a convenient way to speed up the process for the next time. I guess this will help me determine how long they will keep in the freezer. I tried to figure that out last time I made them but my Dad who was visiting, discovered them hidden in the freezer & ate them before I got the chance. He was even more thrilled when I was able to coat some in the chocolate!!
So there you have it, my method of making cake balls. It really is so easy, I hope you give it a try with your favorite cake & icing flavors!

Until next time........ Happy Creating!

Sunday, November 13, 2011

Jingle all the way!

It seems like things in the stores went straight from Halloween to Christmas in a heartbeat!


It always makes me feel bad for the Thanksgiving Holiday because it gets treated like the kid in school who always ate the paste!


While my home is still decorated for fall & there is much discussion on the big turkey dinner, I decided I would get a jump on some Christmas projects I wanted to try.


(Thank you Pinterest)


I have several projects in the works but this particular project was so cute & so fast to get done I thought I would share it right away.


I saw this on Pinterest & remembered it but never did pin it to my board so I have no idea where it originated from but I am glad I saw it because it has awakened my thought process for the endless possibilities!Here was my take on the Jingle Bells Shadow Box. You will have to check back to see some of the other boxes I have come up with.


I started by finding a super deal at Michael's on some shadowboxes, then I found a cute piece of Christmas scrapbook paper I already had & glued it to the front of the frame back (I know you have to think about that for a minute right?) but I am not sure how else to describe it so we are going to roll with that!


Then I glued my sparkle chipboard letters to the front of the glass with my dazzle tack glue

I did it on the outside because I didnt want the glue to be seen if i glues it from under the glass. I also think the added dimention is nice.

The I placed a package of silver bells inside the shadowbox frame to roll around freely & affixed the backing in place.
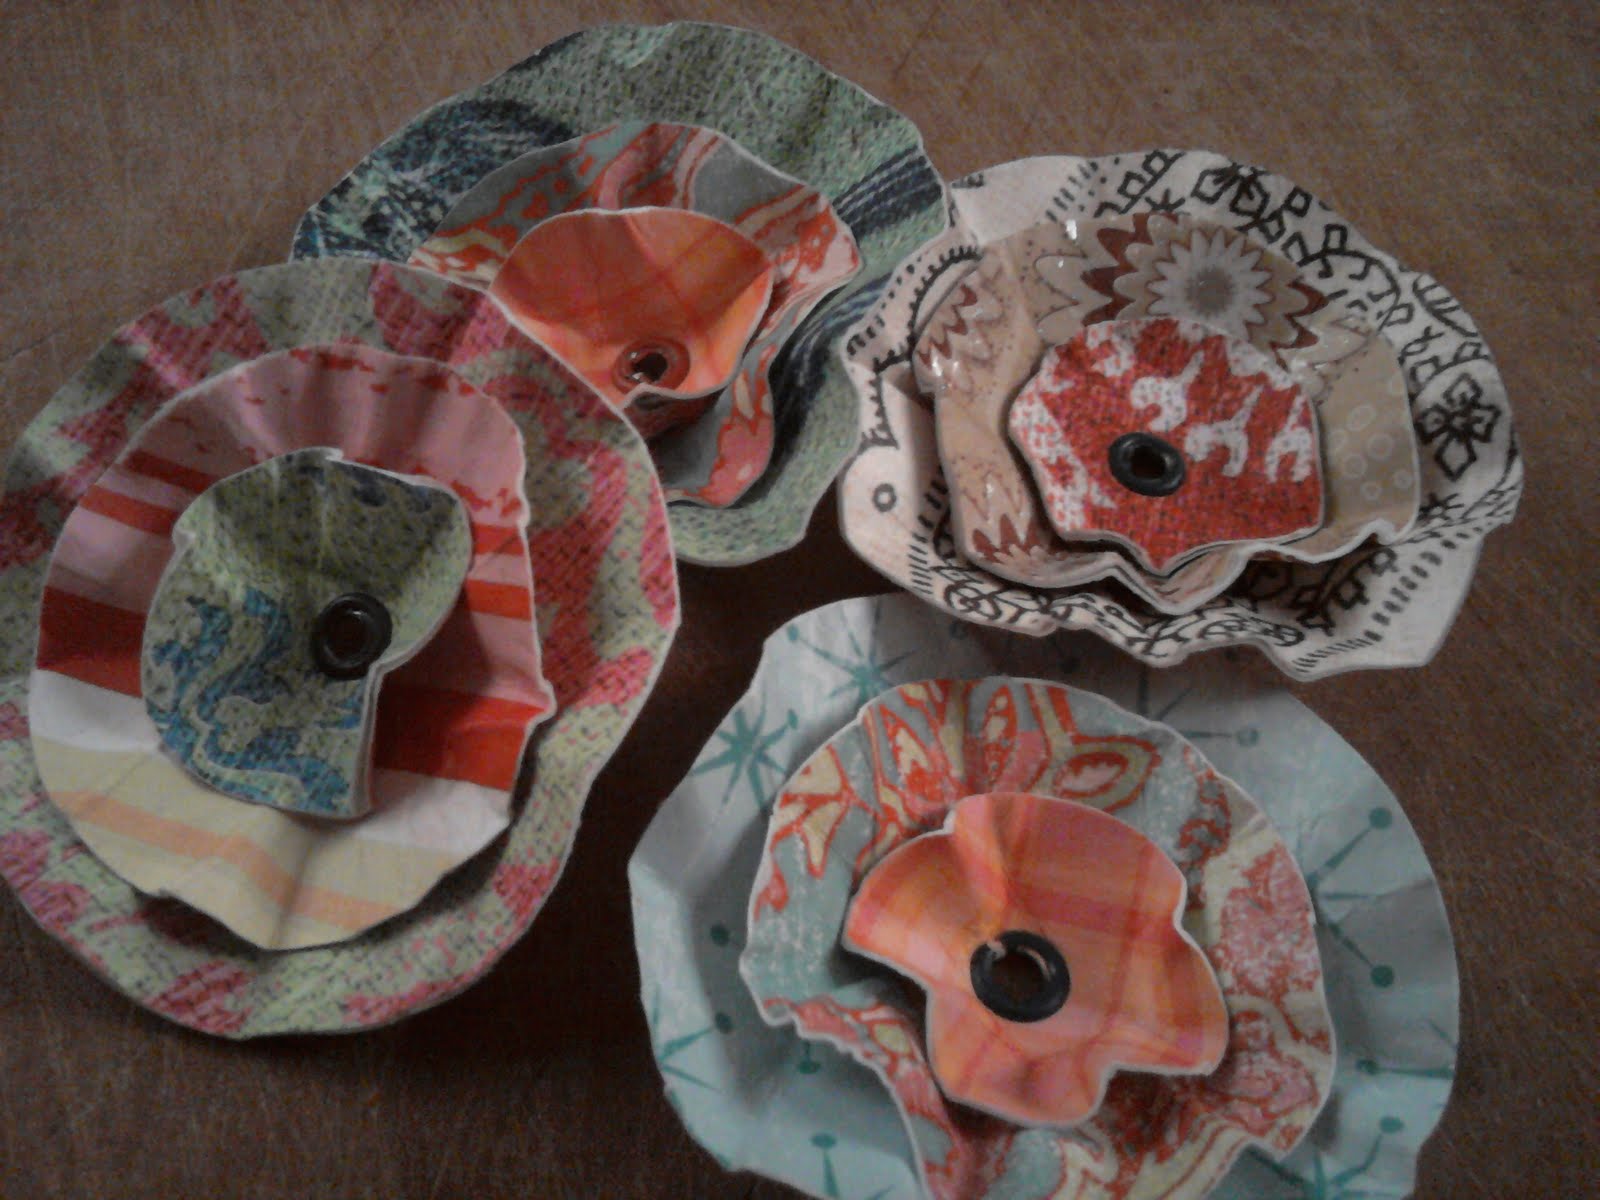
It looked really fun & cute just as it was BUT I felt like it needed that little something extra so I added a bow
and there you have it!!! a cute project that took less than 15 minutes. I was so excited about it that I was actually giddy & for a split second thought, we could just skip Thanksgiving & go straight to putting up the Christmas tree....NAH just kidding, we cant pass on Thanksgiving TURKEY & pumpkin pie!
This project cost me less than $10.00 & it makes such a cute gift


or something to deck your own halls with!


Until next time. . . . .Happy Creating!


Saturday, October 29, 2011

Halloween Pumpkins


That little pumpkin has a slightly happy face...I wonder what the rest of them will turn out to look like. Yes we do have an arsenal of carving tools as you can see, you know just in case the pumpkins decide to get a little unruly!! muhahahaha!

Here is my little guy working his carving magic. I let him use a steak knife this year because all of our pumpkin carving tools bit the dust from a few years of carving amazing pumpkins!

He made me nervous a few times but with some direction he did GREAT!
& you know what happens when you carve these babies out & give them lively faces.....yep you know it...they reward you with beautiful & delish seeds!!

WE love pumpkins seeds at this house!

This year I made them with garlic salt! DELISH!! So delish in fact I am not sure we will have a whole lot left for Monday night's Annual All Hallows Eve Gathering.


For any of you out there who have never made your own roasted seeds because it scares you....well I am here to tell you its super easy & you should try it!

Here is how I do mine:

~after scooping out the seeds you wash them off really well removing any pumpkin gut remnants

~I find dumping all the seeds in a colander works well for washing

~after you have washed them off I lay them out on a clean dish towel that absorbs liquid well

(you know how some towels don't do quite get the job done)

~once they have been payed out in a nice even layer I sprinkle my seasoning on them

~You can use any flavor combo you like, you could do a ranch or taco season on them, that would be YUM!

~Once seasoned leave them on the towel for about 45 minutes then dump them onto dry cookie sheets into an even layer

~bake them in an oven set at 225 anywhere from an hour to an hour & a 1/2 depending how wet they were when they went in & how done you like them

That's it...easy peasy!


these guys here look like a motley crew!! but they yielded a ton of seeds. They gave us more seeds than the 2 large ones did!

Our large pumpkins are still waiting to get faces because my oldest son & the Mr. cant decide what to do with them yet.....but when they do you can be sure I will share!


Don't they look so spooky all lit up? I especially like that I can enjoy their illuminated faces while listening to Halloween Radio on Pandora! It amazes me just how many spooky songs are out there!

You should check it out when you get the chance!


Oh & one more thing before I head off to a Halloween dream land...


I would like to say THANK YOU to one of my Besties Tami!!

She made me the MOST AMAZING collection of Halloween magnets ever!

(She crochets & I absolutely can't!)

When I look at them I cant help but smile!

Because they make me so Happy I want to share them with the world because maybe you can find some happiness in them too! You know spread the love!


See???!! Aren't they the cutest!?!?!


I love them all BUT Frankie must still be may fave because every time I look at him I literally giggle & get giddy!


On that HAPPY note I am off, until the next project....Happy Creating!


Sunday, October 23, 2011

my honest opinion

Ok . . . .so I remembered the name of this tool. . .The Crop-A-Dial. Now that I have had the chance to thoroughly use this tool I want to say I Still L-O-V-E this tool BUT

(YES there is a BUT in there)

you cant slide a paper more than 1 & 1/2 inches into the mechanism to crimp an

eyelet, snap or grommet!!

I was working on a project for a Christmas gift & much to my surprise I had to adjust the size on my paper flower just so I could use the the Crop-A-Dial to crimp an eyelet on. Insert sad face here because I am totally in love with how easy this tool is because it has everything built right in, including 2 different size hole punches! Maybe I just wasn't smart enough to pay attention to that when I bought it or maybe I was just so excited to get it. . .either way I felt a little disappointed. Luckily it worked out of for this particular project BUT I was heartbroken because if I want to place a snap or eyelet onto a larger paper I will have to buy a separate tool to take care of the job. UNLESS one of you out there know something I don't know. . . . .it is possible I just don't know what I'm doing! The outer packaging said to read the instructions inside but there were no instructions in the hard plastic packaging (you know the kind. . .the ones you have to be a an engineer to open) there was only a simple chart on the back package & some vague wording.

As you can see...my paper flowers came out super cute, I just wish I could make bigger ones for some other projects I have in mind. The largest circle used here is 2 inches.
The Crop-A-Dial is a VERY easy tool to use & I will definitely be using mine for ALL the smaller projects I work on just for the simplicity of it!
I especially like to use this tool for the ends of my paper banners because it ensures that the ribbons don't tear the paper!

I am looking forward to using this tool on fabric & I will definitely let you all know how it does!

I wanted to give my honest opinion of this tool in case anyone out there was interested in it.

So in light of what I have learned YES I would totally recommend this product to crafters for smaller projects & if any of you out there in blogland have a trick to use this tool for larger projects please let me know...I would love to hear from you!


Until then...Happy Creating!


Saturday, October 15, 2011

Girly Banner

Let me just start by saying . . . I L-O-V-E this new tool!! It is the best thing ever to set grommet's, eyelets & snaps!!! Easy to use all in one tool! I got mine at Michael's with a 40%off coupon & worth every penny! The name escapes me at the moment but when I think of it...I will post it! lol I used my new tool to set this cute little dragonfly eyelet. . . isn't it so cute??!

It goes so perfect with my girly banner!

I then tied a white satin ribbon through, making it look like a little rose (well sorta).

I used ribbon on the end pennants for easy banner hanging.

This glue is some amazing stuff too! I use it on all kinds of projects where metal or glass are involved because once it sets. . . that stuff doesn't budge!


I used it tonight to glue little purple gems onto plain old brads!!!


I think affixing them to the plain brads just added that extra something special!

(for a very special girl I might add)

I figured since i was using fun girly paper, it might as well have some bling on it too!

Hence the glitter paper as well!


I also hand folded strips of pretty paper into the rosettes & hot glued them to the pennants.

the letters were store bought glossy black chipboard. The were the sticky kind but I had to hot glue them to the glitter paper. . . .they weren't sticking to the glitter very well as you can imagine!

Here is the finished product!!


The girly banner for the very special girl!


I was able to give the banner to her tonight & it was so good to see her bright smile!

She moved away from us & we miss her a lot! BUT we are glad she can come for a visit every now & again!


While I was busy making a girly banner, my rough & tumble creative boy was busy making something for ME!!!


Isn't it so bright & pretty?!! I love my bracelet! it is cheery & colorful just the way I like things to be! I am so glad he is not too manly man yet to take time to make something from his heart!

yep. . . . .this guy right here, little Mr.

Thank you my little love for making me feel extra special today!

Saturday, October 8, 2011

Homecoming Dance

Tonight was the big dance...the very first formal my son will be attending during his High School career.


The boys were patiently waiting for the girls to finish getting ready!


Finally. . . . . . . .?? Sike false alarm it was someone else coming down the stairs haha


Look how cute they are waiting with corsages in hand!
placing the corsage can be difficult. . . .


. . . . BUT not as hard as pinning a boutonniere


Honestly I think nerves were taking control on the pinning...it's not easy when you have 4 or 5 sets of parents watching your every move!


Here is the whole gang looking so great!


The girls taking the opportunity to get goofy


& the boys were just happy to stand there & look stunning!


Such handsome young men!


here is my son with his Homecoming date


I love that my son wore black on black because he looked so sharp!


But what I really want to know is when did my little baby grow up into his Dad's shoes literally!


It seems like just a short time ago that he was a goofball kid in elementary school nowhere near ready to go to dances, or drive, let alone wear the same size shoe as his Dad!


It happens so fast!


I hope the kids have a good time tonight making the memories to last a lifetime!