
When I make my paper banners I always try to make some kind of embellishment between the pennants. Sometimes I dress up the brads a little bit but my favorite thing to do is to make my
paper flower pinwheels.
I think they make a paper banner look very cute & a little different from the usual. I also think it is a great way to use up all those odd size papers you accumulate when working on paper projects {like all the extra triangles you get from cutting the pennants out} **hint~hint** and the crazy cool combos you get
with all those left over bits can turn out incredibly awesome.

You can make the circle cut outs for these as big or as small as you want. In my case I had the
crop-a dial to install the grommets so I was limited to the size of paper that would reach the center of the circles. Because of this I couldn't make the largest circle more than 3 inches. Then I just made the circles go down in size from there. It really isn't a science.....more of a preference of what you like. Just do what feels right to you.
crop-a dial to install the grommets so I was limited to the size of paper that would reach the center of the circles. Because of this I couldn't make the largest circle more than 3 inches. Then I just made the circles go down in size from there. It really isn't a science.....more of a preference of what you like. Just do what feels right to you.
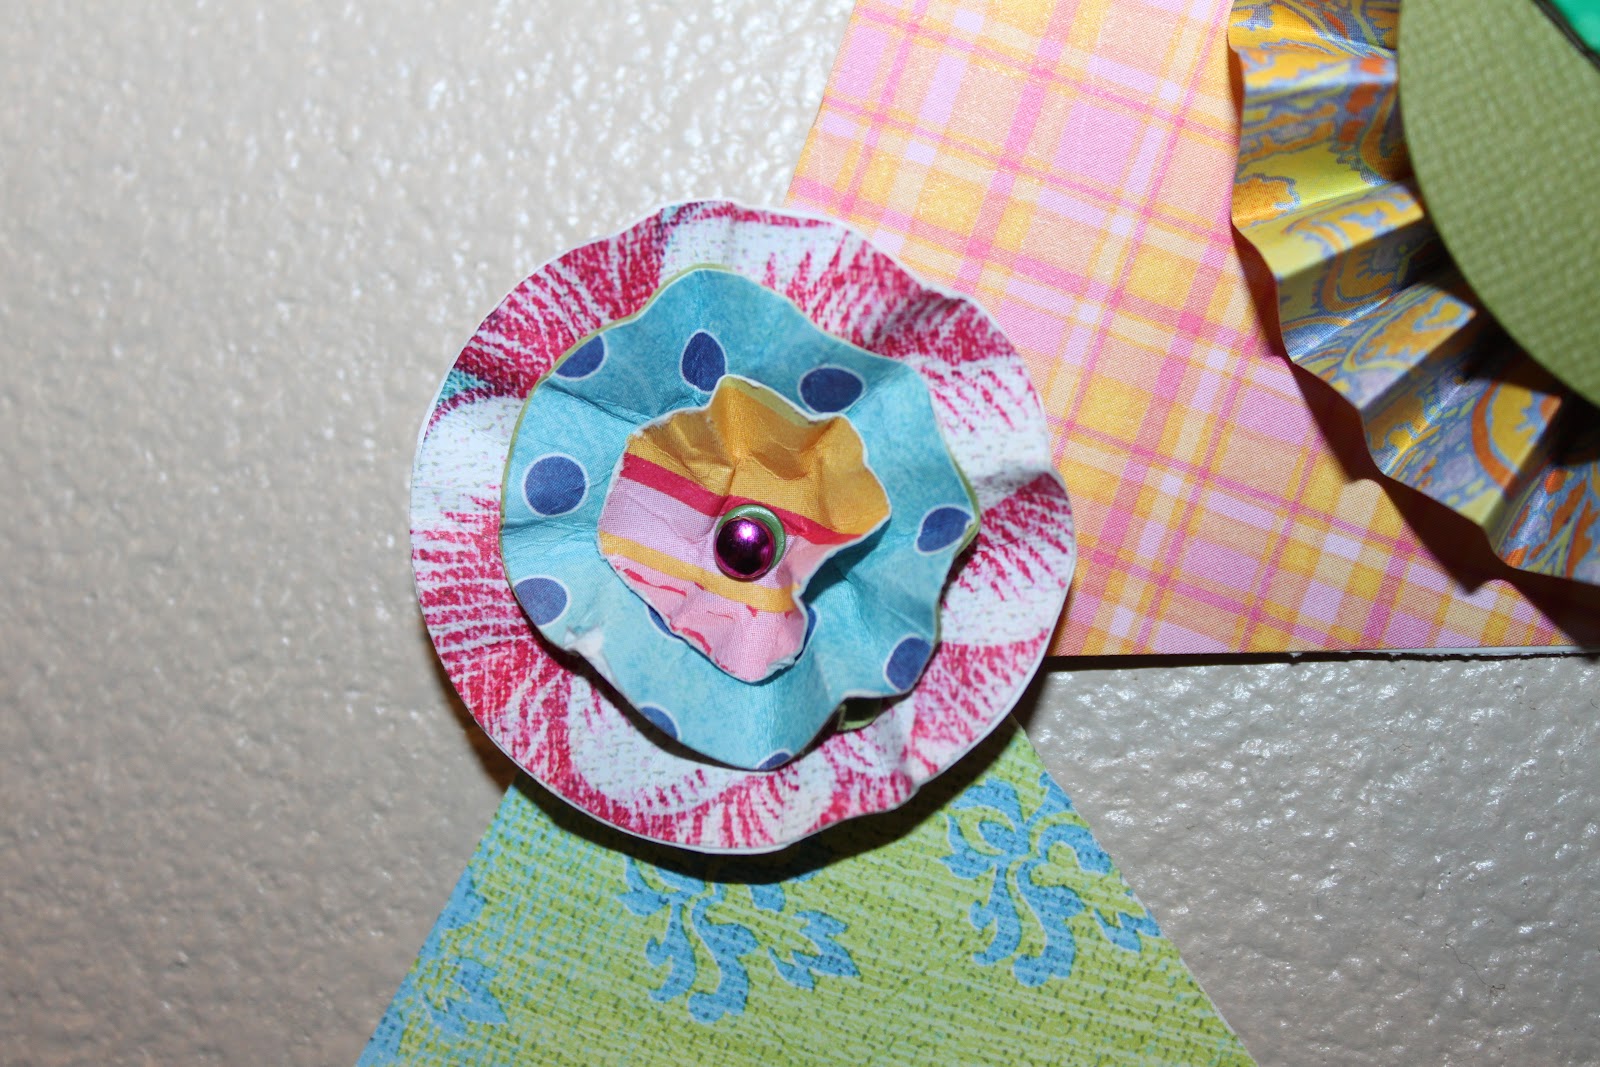
Once you have the circles cut out just punch a hole in the center so that the grommet can be punched without damaging the paper. I like to slightly crumple my circles to give them some wavy depth {it also makes it easier to get larger circles punched with the crop-a-dial}. I also like to take colored sharpies & color my brads but that's totally optional. Then you insert the brad through the circles & then through the pennant corner, fold out the back & there you have it. . . . .

cute little paper flower pinwheels {at least that is what I call them} I mean after all, they look like flowers but spin like pinwheels. . . . . .but you can call them whatever you want, that's the whole fun of crafting in the 1st place, coming up with new things every day.

I always love to see what every banner ends up looking like. I also LOVE all the eclectic looking colors & patterns you get when you mix it all up.
So next time you have all those little scrap papers left over. . . .put them to good use & incorporate them in your next paper banner project.
Happy Creating

 I used my new tool to set this cute little dragonfly eyelet. . .


 yep. . . . .this guy right here, little Mr.