Showing posts with label DIY. Show all posts

Tuesday, May 29, 2012

Independence Day Rag Banner

I was commissioned to make a rag banner for an up & coming photographer with
Christy envisioned a vintage looking scene for an Independence Day mini shoot!
I was all about it because it sounded so fun & I have been wanting to make one of these rag banners for a while now! so it was a win win for me!
Not only was this the perfect opportunity to try something new BUT 
I had all the right scrap fabric for the job
well all except for the red. . . . . that had to be purchased
but none-the-less I was able to use up a shirt my son has long since outgrown & some fairly new jeans that my son thought would be fun to cut holes in~ahhh the fads of youth~been there done that myself. .  .
c'mon, you all remember the 80's. . bleached jeans & holes galore & lets not discuss the big hair
. . . . .Oh back on track here. . . so I was able to put those items to good use in this project.
I was itching to wrap this in clear string lights but 
that would be pointless for the outdoor photo-shoot it was destined for.
I guess I will save that for the next rag banner 

here is the rag banner working the camera. . . . almost as hard as the kiddos were!
Christina Dru Photography captured that vintage feel & as I look at these photos. . . .
I deem them Tommy Hilfiger Ad  worthy!
What do you all think??


Head on over to Christina Dru Photography and see what she is all about  & give her some page love


~Happy Creating

Pin It

Friday, May 25, 2012

A Wednesday night Bathroom Re-do

Wednesday I had an ambitious idea to come home after work & paint the upstairs bathroom.
Seems like a crazy idea after a long day at work but painting is like therapy for me.  Hard work yes, but hours of me & my own thoughts is priceless 
{because you know everyone leaves you alone when you are doing hard work}
And look at the end result here. . . just beautiful & crisp & clean!
Can't go wrong with that
A stylish Boys bathroom update
I came up with this pretty grayish blue color the way I normally do. . . 
with leftover paint 


Here is the mix of the 2 very pale blue's I confiscated from my Mom

It was pretty but not quite the blue I wanted. . . . so I took this Royal blue left over from my son's room re-do a few weeks ago and. . . . .

started mixing
look how pretty the blue swirls are
but the results were so satisfying. . . .
just see for yourself
Before
After
It is amazing to me how much cleaner the toilet looks~hahaha
Before
After
I am so excited that this bathroom has some life in it now
Before
after
{ooops Someone needs to buy some light bulbs. . . again}

After

before

I really always have loved to paint a room.  I think it comes form my Mom who never sits still 
{I swear she will paint the same room twice every year}
and from my memories hanging at my Dad's house in Venice Beach every summer. . . I think that was the 1st time I got to help paint a room & it was a fun experience with my step-mom
so between the 2 Mom's. . . I earned a love of painting a room.
So thank you both because ..I am a self-proclaimed room painting rock star!

Now I just need to figure out what decorations to put in their for those boys of mine!
{I see another bathroom post coming in the near future}

**my tip of the day** 
never throw out any left over paint no matter how small amount it is!
you never know when you might need it to touch up a ding spot 
{or use on a craft project to with your newly painted space}
I scraped this little bit into a leftover baby food jar with a spatula. .& honestly to look in the can you wouldn't think there was enough to save but there was a good amount for touch ups.
so never underestimate


So here is to a weeknight room re-do

~Happy Creating

Pin It


Wednesday, March 14, 2012

from trash to treasure

Don't you just love brown & turquoise together? I know I do!!
& then throw in some silver & you definitely have a stellar combo~


some time ago, a friend of mine brought a necklace to me that was broken in several places & asked if I could do something with it.  Not only do I love to make pretty things but I also like a good challenge, so I accepted the project & started thinking of ways to change it up.
The piece she brought me was mostly pink with a few other colors & the chain was super long.
She wanted the chain shorter so I obliged 
(sorry I don't have pictures of it but this was WAY before my blogging days)
The necklace I made her was a success...she totally loved it!
But that left me with a length of chain that I could work on for fun.
So I started with a single brown & turquoise bead because I thought it was beautiful

 I sorted through all my beads to find the ones I thought matched perfectly~I was pleased with the results!
I was also excited to work on a design like this because this was my first necklace to have such symmetry & separation between the bead work.
 The chain that was used isn't the kind you can just add jump rings to & I don;t have a soldering gun.  So I had to think of a way to attach a clasp without soldering it... thinking...thinking...I got it~I will attempt to use crimp beads~it is definitely a calculated risk because crimp beads are tricky if you don't get them done tight enough.  And the last thing you want is everything falling apart at the worst moment.
But I crimped away & I tugged & yanked on that chain as hard as I could Many Many times & it held up!!! YAY.... total excitement....on to the fun part of getting the beads on the chain in just the right places!

 Once I got the necklace done I KNEW I had to make earrings to match! so back to the bead box to be sure I had enough beads & lucky for me. . . . I had JUST enough!


So from one broken down necklace that was almost trashed came a fixed necklace, a new necklace & some super cute earrings! AMAZING! 
Next time you have something that's SEEMS like it's on its last legs, just think one step beyond to what could be and you could create AMAZING too!

Happy creating~

Pin It

Thursday, March 8, 2012

Ornies aren't just for Christmas

I made these little treasures for my Mom this last year for her birthday & yes. . . . you also caught a glimpse of some at Christmas but how can you resist making these little beauties as 
a memento from a special vacation and then giving it to people you care about.

making ornies like these are not very difficult at all & you don't have to limit yourself to sand & shells. My rule of thumb is: if it fits, it works. 
And won't they look so good hanging in a bright sunny window ~ who knows hangining them in a kitchen window might make doing dishes slightly more bearable.
You can find plastic or glass ornaments{which is what I used} in the craft section at almost every store.
then you fill them with things that have some meaning.  In this case for me it was the sand & sea shells because my family spent an amazing week at a beach house in Florida.  It was such a relaxing vacation, not one of those runs around & play so hard you need a vacation from your vacation, vacations.
We also spent everyday shell hunting. . . . it was our "thing" & we all had a blast doing it.

 oh look at me daydreaming about vacation. . . back to the ornaments. . . 
once you fill your ornies, GLUE the cap on.  For ornaments with sand in them this is very important.  Even though I tried not to use too much sand {so you can always see the shells} it was still kind of heavy. . .so glue that top on, trust me you will feel better about it if you do.
some people would stop there or just add a small ribbon but that is just not in my nature.  Once you get to know me you will understand what I mean *ha
I had the most perfect glittery netting with matching grass &berries from an old Christmas decoration.  This went so perfect with a glammed up beach treasure.  It gave it some sparkle without making it too overdone. . .still light & airy.  
Now, aside from maybe attaching some filament line, that's it, that's all it takes.
for little money & practically no time at all, you have a very nice way to capture a memory & give a beautiful thoughtful gift any time of year. . . not just Christmas.
As you can see here, shell hunting was a non stop activity for all of us and it was serious business.
 
I think little guy was just waiting for them to roll up on the shore
We are so serious about our sea shell hunting that we are all going back again this year. . . . look out beach here we come ! !

Happy Creating

Wednesday, March 7, 2012

Paper flower pinwheel


      When I make my paper banners I always try to make some kind of embellishment between the pennants.  Sometimes I dress up the brads a little bit but my favorite thing to do is to make my 
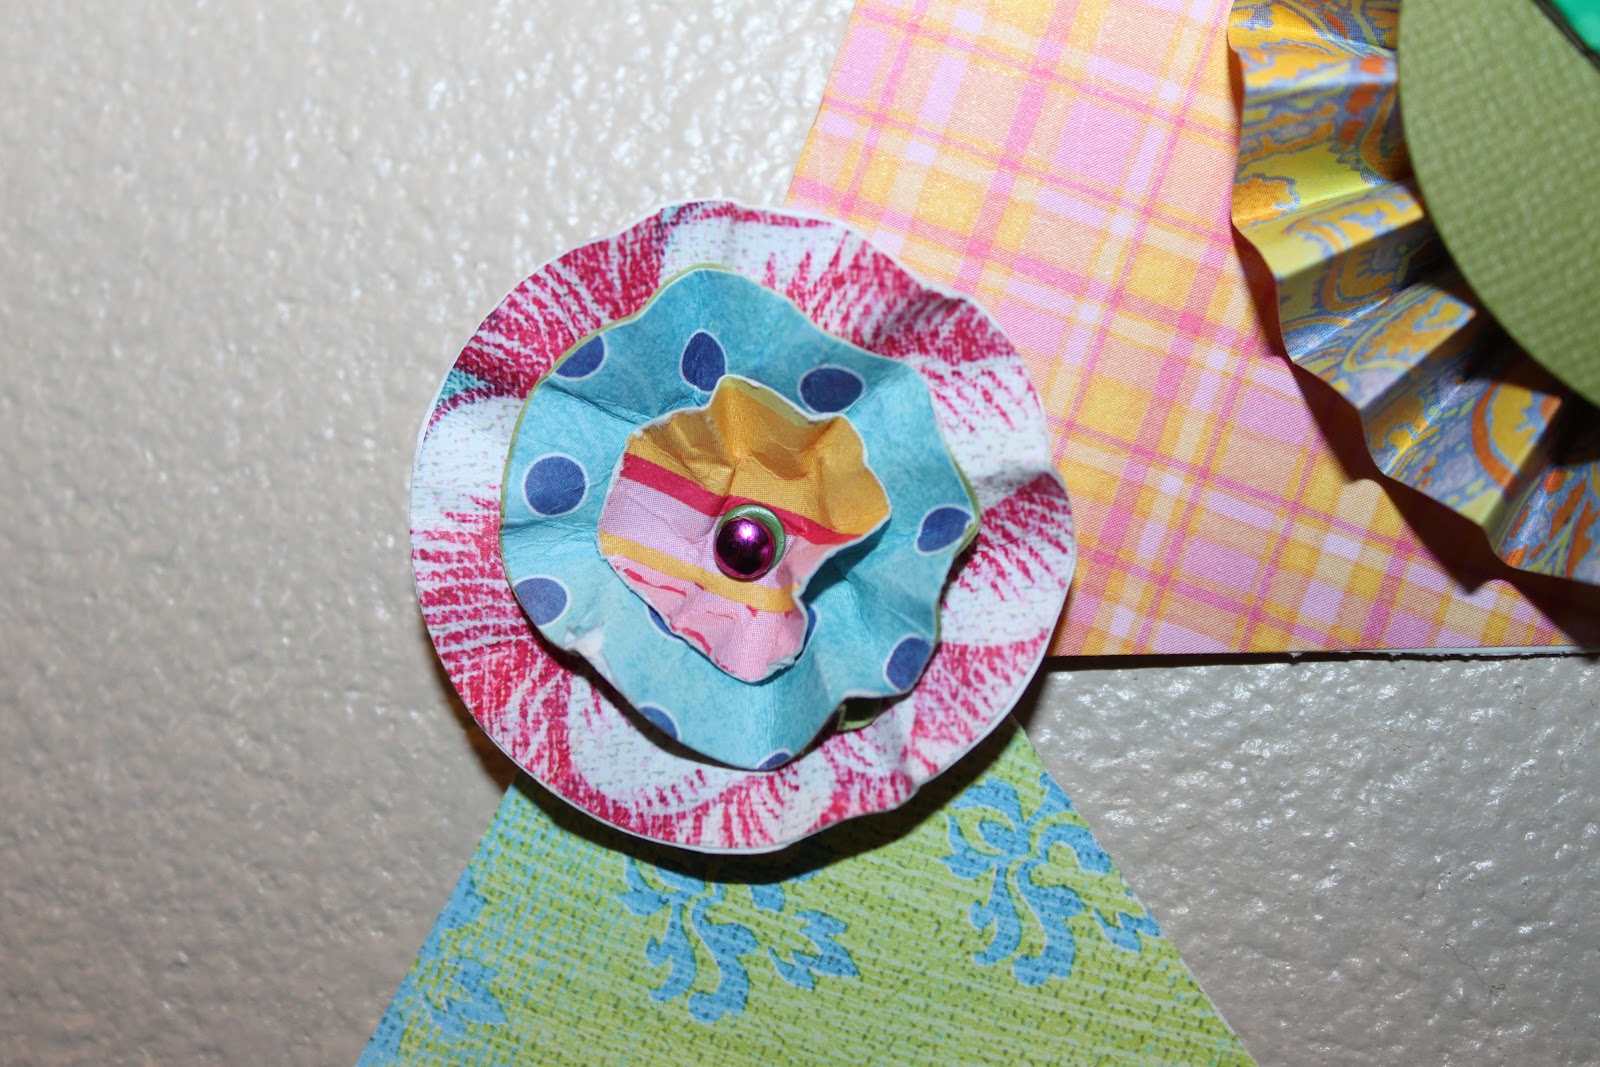
paper flower pinwheels.  
I think they make a paper banner  look very cute & a little different from the usual.  I also think it is a great way to use up all those odd size papers you accumulate when working on paper projects {like all the extra triangles you get from cutting the pennants out} **hint~hint**  and the crazy cool combos you get 
with all those left over bits can turn out incredibly awesome. 
                                                                                     

You can make the circle cut outs for these as big or as small as you want.  In my case I had the
crop-a dial to install the grommets so I was limited to the size of paper that would reach the center of the circles.  Because of this I couldn't make the largest circle more than 3 inches.  Then I just made the circles go down in size from there.  It really isn't a science.....more of a preference of what you like.  Just do what feels right to you.


Once you have the circles cut out just punch a hole in the center so that the grommet can be punched without damaging the paper.  I like to slightly crumple my circles to give them some wavy depth {it also makes it easier to get larger circles punched with the crop-a-dial}.  I also like to take colored sharpies & color my brads but that's totally optional.  Then you insert the brad through the circles & then through the pennant corner, fold out the back & there you have it. . . . .


 cute little paper flower pinwheels {at least that is what I call them} I mean after all, they look like flowers but spin like pinwheels. . . . . .but you can call them whatever you want, that's the whole fun of crafting in the 1st place, coming up with new things every day. 


I always love to see what every banner ends up looking like. I also LOVE all the eclectic looking colors & patterns you get when you mix it all up.
So next time you have all those little scrap papers left over. . . .put them to good use & incorporate them in your next paper banner project.

Happy Creating


Monday, March 5, 2012

Partridge Family Floor no More


When we moved into this house 5 years ago
{my how time flies} we fell in love with our back sun-room.  It was a pretty big size space with lots of windows & a larger than life cathedral ceiling~what I did't like was the floor that looked like the long lost relative of  the Partridge Family bus .  I always knew it had to go, so in preparation for my sisters baby shower back in August, that floor got a face lift.


Because we had just gotten back from vacation & every extra cent I had went into making this the best baby shower ever~I took all kinds of leftover paint from my mothers basement to concoct what was going on the floor.  Risky, yes, BUT I am that kind of girl.  I figure if I hated it or it came out awful, I would just paint over it, I mean it's just paint after all.  That's me~ the risk taker :)
So after the daunting task of taking all the junk out of there & enlisting the men of the house to move the gigantic weight machine, I got down to business.  After getting midway through I was already excited.  The difference was seriously night & day.  I was also amazed that with all the different paints I used, that it covered that hideous floor in 1 coat {but I did 2 for good measure}


 After about 2 days worth of hard work, it was done & the light color floor {that I know some of you are thinking I have lost my mind over} looked amazing with the new beachy furniture I purchased to make my sun-room the spot I always knew it could be.  Of course I didn't take pictures of the room without all the baby shower decorations or in the setup that it usually is in, but that was before getting my blog up & running but you get picture~ Great looking floor now.


After over 6 months of kids, dogs & craft projects all over it, it has held up pretty well & I don't regret putting the Partridge Family floor to rest.  In fact I have made this MY ROOM ONLY & this is where I craft & blast music from time to time {because I love to sing at the top of my lungs} and this is where I host large gatherings.
This space has been transformed & it is a space that I don't have to try & hide from company anymore.  


                   ~happy creating

Sunday, March 4, 2012

Pour some sugar on me

I made some sugar scrubs for my family at Christmas.....and I also made one for myself ~ I wanted to make these because I felt that they were so much better for your skin than the stuff you buy in the store with stuff in it you cant even pronounce.
I found these fun colored mason jars at my local drug store of all places & at $1.00 a piece it was an awesome deal,  perfect for storing the scrubs & they were also color coordinated to the scents I was making.


 I made my scrubs with plain white sugar (you could also use sea salt) olive oil, lemon & lime zest & I also tried extracts (the kind you cook with) in the one I made for myself.  I am sure some people will tell you NOT to use those but it is what I had on hand & I figure if you can eat it how on earth would it hurt you in the shower...so I tried it.


I poured sugar in a bowl & mixed in the olive oil until I got the consistency I wanted.  I used the zest of either the lemon & the lime & added it to the batch I was working on. Can I just tell you it smelled WONDERFUL ~ there is nothing like the smell of the zest of lemons & limes in my opinion.


I added the extracts to the other batches & those smelled wonderful as well.  I really loved the peppermint & I think it would be great as a foot scrub.  Something about the peppermint smell that is rejuvenating an there is no other spot on the body that needs it more than tired feet.  I mixed the cherry extract with a little almond extract & used that on myself.  It smelled good & the olive oil in the shower felt luxurious to me.

 
Since mid December I have been battling some kind of skin condition that has made me itch intensely & I also had huge hives.  I have been to the doctor 5 times & they think I may be allergic to something but they have no idea what.  I was so thankful that I made these scrubs because the olive oil moisturized my skin in a way that nothing else did & it lasted all day, something most lotions or body washes wont do.  The sugar also helped with the itching because that just felt good.


The scents you can make with natural essential oils & the zest of citrus are limitless.  I loves the homemade sugar scrubs because I felt like I gave myself a treat without harsh chemicals & fragrances.  I also love the way the skin absorbs the olive oil.  making the scrubs were a cinch so I highly recommend it. I did everything by the way it looked so I don't have a recipe but I know there are plenty out there so just look a few up & give it a try.

happy creating~